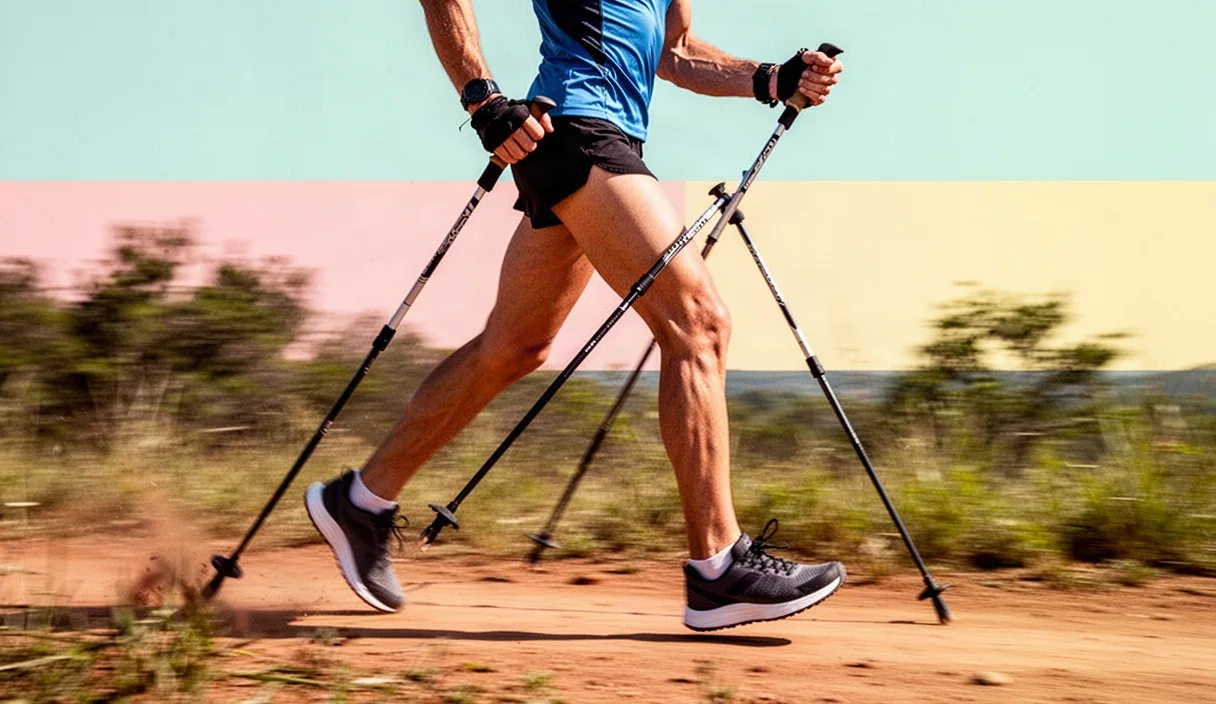

Fix your arm drive first. Nordic walking relies on active upper-body propulsion, yet most walkers treat poles as balance canes rather than levers. When your arms swing without loading the strap, you lose upper-body propulsion and reduce caloric burn. True diagonal stride requires a synchronized rhythm: opposite arm and leg moving together, a full shoulder pivot, and a deliberate push that travels past your hip.
Poor technique often hides behind high step counts. If your pole tips skip across the asphalt or hang vertically on contact, you are dragging dead weight. This guide breaks down the biomechanics of shoulder drive, hand release, and cadence so you can generate real forward propulsion on flats and moderate inclines.
Diagnosing the passive pole dragging habit
Check your pole tips now. If the rubber pads show uneven wear on the front lip rather than a clean, flat bevel across the angled base, you are dragging your poles. Passive dragging occurs when a walker holds the grip firmly throughout the full swing cycle, failing to push backward through the strap. The pole swings forward, taps the ground, and merely trails behind the body without bearing load.
Identify the three mechanical symptoms of dragging during a regular session:
- The vertical plant: The pole tip touches the ground in front of your lead heel. This acts as a braking force rather than a propulsion vector.
- The white-knuckle squeeze: Your fingers stay clamped around the handle behind your hips, which cuts off arm extension and forces the elbow to flex early.
- Silent straps: The wrist strap stays loose on the back of your hand instead of supporting your body weight during the backward thrust.
Perform the drag test on asphalt or packed gravel. Walk twenty paces while holding the grip normally. Listen to the sound of the tips. A sharp, rhythmic tap-push-release sound indicates positive ground engagement. A scraping, continuous hiss means the tip stays in contact without pressure. Dragging wastes the mechanical advantage of the carbon or aluminum shaft, turning a full-body workout into standard walking with extra wrist strain.
Arm swing initiation from the shoulder joint
Pivot from the shoulder socket. The elbow must remain relaxed, with a soft bend between 120 and 150 degrees during the forward reach. Do not pump your arms like a track sprinter by flexing the elbow to 90 degrees. Sprinter-style arm flexion isolates the biceps, shortens the reach, and prevents the pole tip from catching the ground at an effective backward angle.
Think of your arm as an open pendulum suspended from the glenohumeral joint. The forward swing brings the hand up to roughly navel height, never crossing the sternum midline. As the lead foot strikes on the heel, the opposite hand delivers the pole to the ground. The latissimus dorsi, posterior deltoid, and triceps must contract as a unit to initiate the backward push.
| Biomechanical Variable | Elbow-Driven Swing (Incorrect) | Shoulder-Driven Swing (Correct) |
|---|---|---|
| Primary Joint Motion | Hinge flexion at elbow | Pendulum extension at shoulder |
| Forward Hand Height | Chest to chin height | Navel to lower ribcage height |
| Primary Muscle Load | Biceps brachii and anterior deltoid | Latissimus dorsi, triceps, core rotators |
| Propulsive Path | Upward and downward chop | Linear backward push through strap |
Keep your torso tilted forward by two to three degrees from the ankles, not the waist. This forward lean creates room for the shoulder to extend fully behind the torso. If your spine stays completely vertical, the humeral head hits an anatomical stop early in the backswing, forcing you to rotate your hips excessively or bend your elbow to compensate.
Optimal pole plant angle behind the pelvis
Plant the tip at approximately 60 degrees to the ground. Never plant the pole perpendicular to the trail. A 90-degree angle drives force directly into the ground surface, transmitting shock up into your wrist and elbow joints while doing zero work to propel you forward. A backward angle of 55 to 65 degrees transforms downward pressure into linear forward momentum.
Target the ground plant position between your front heel and your back toe. In a standard diagonal stride on flat ground, the pole tip hits the surface roughly opposite the heel of your front foot or slightly behind it, directly under your center of mass. This geometry ensures that as soon as the tip grips the surface, your arm is already in position to push backward against the strap.
Adjust your plant angle based on terrain grade:
- Flat pavement: 60-degree angle. Tip lands even with the pelvis or mid-stride line. Maximizes propulsion and glide.
- Uphill climb (5 to 8 percent grade): 45 to 50-degree angle. Tip lands farther back to shorten the lever and increase torque through the upper back.
- Downhill descent: 65 to 70-degree angle. Tip moves forward toward the front foot to provide controlled stability without jamming the shoulder.
Maintain consistent pressure against the strap from the moment of ground contact until the hand passes behind the hip. If your tip slips backward on asphalt, you have either chosen the wrong rubber pad compound or you are planting too far back without weighting the strap. Check your pole length: multiply your height in centimeters by 0.68. If your poles are too tall, you cannot achieve the correct plant angle without raising your hands too high.
The open hand release drill
Release the handle completely behind the hip. This single mechanic separates basic trekking pole use from proper Nordic walking. If you do not open your hand, your arm cannot extend fully behind your pelvis without twisting the wrist into an unnatural ulnar deviation. The release allows the arm to form a straight, continuous line from the shoulder through the wrist down to the pole tip.
Execute the release drill using this four-part progression during your warm-up:
- Adjust the harness strap: Fasten the glove-style strap snugly around your palm and wrist. The wedge between thumb and forefinger must sit tight against the strap junction. You should be able to press backward hard without your fingers touching the plastic grip.
- Open on the hip line: Walk forward at a moderate pace. As your pushing hand crosses the seam of your trousers, open your fingers completely. Spread your fingers wide to stop any instinct to grip.
- Extend along the line: Push entirely against the strap. Feel the triceps contract as your elbow straightens. The pole will trail backward, suspended by the wrist strap, maintaining contact with the ground until the swing reaches maximum extension.
- The snap-forward recovery: As your opposite arm begins its forward stroke, let the tension release. Bring the rear hand forward by flexing the shoulder. Close your fingers gently around the handle just before or at the moment the tip touches the ground again.
Spend five minutes practicing without poles if you struggle with hand tension. Swing your arms naturally while opening your palms behind your back and making a light fist as your hands swing forward past your hips. Once this pattern feels automatic, attach the poles and replicate the movement. Never squeeze the grip tightly during the recovery phase: a relaxed grip conserves energy over long distances.
Cadence targets for aerobic efficiency
Match your arm rhythm to your foot strike. Nordic walking cadence typically ranges between 110 and 130 steps per minute, which equals 55 to 65 double pole cycles per minute. Walking below 105 steps per minute often causes long, unnatural overstriding, where the heel strikes too far out in front and destroys forward momentum. Overstriding puts undue shear stress on the knee and prevents fluid pole planting.
Cadence directly determines your metabolic output and heart rate response:
| Cadence (Steps / Min) | Stride Character | Primary Training Target | Typical Surface |
|---|---|---|---|
| 105 to 112 | Long stride, deliberate push | Technique acquisition, base endurance | Rolling trail, packed dirt |
| 113 to 122 | Standard athletic diagonal stride | Aerobic efficiency, zone 2 training | Flat pavement, crushed gravel |
| 123 to 135 | Short, rapid drive and recovery | High-output conditioning, tempo work | Firm track, gradual uphill |
Use a metronome app or a playlist calibrated to 118 beats per minute for baseline workouts. At this tempo, focus on keeping your ground contact time short. Your foot rolls smoothly from the heel through the midfoot to a firm toe-off, while the contralateral arm mirrors that timing with a crisp pole plant and back release. If you find your cadence climbing above 135 steps per minute, you are likely shortening your arm stroke and eliminating the open-hand release. Pull the tempo back down until you can complete the full backward push on every stride.
Common mistakes
Watch for these four recurring technical errors during training blocks:
- Overstriding: Reaching too far forward with the lead foot to match a long arm swing. Fix this by keeping the front foot plant under a softly bent knee. Propel yourself from the rear leg, do not pull yourself forward with the front heel.
- Chicken-winging: Flaring the elbows outward away from the ribcage during the push. Keep your elbows tracking parallel to your walking direction. Flared elbows place the shoulder joint in an internally rotated, impinged position under load.
- The death grip: Clamping down on the handle during both the forward and backward swings. This causes forearm fatigue and limits wrist extension. Rely on the wrist harness to bear the propulsion force.
- Swaying torso: Tilting your shoulders side to side rather than rotating through the thoracic spine. Your torso should display a slight rotational counter-movement, but your head and center of gravity must travel along a straight forward track.
Practical next steps
Set aside ten minutes at the start of your next three sessions for deliberate form drills. Strip the movements down before attempting high cadence or long distances on trails.
Begin with three hundred meters of no-pole striding. Let the poles hang loosely from your wrist straps, dragging behind you on the ground, while you walk with an exaggerated arm swing from the shoulder. Notice how your arms naturally balance your legs. Once that rhythm feels solid, catch the grip at the forward point of the swing and begin pressing backward through the strap. Do not rush to increase your pace.
Film your stride from the side using a smartphone mounted on a fence or held by a partner. Record ten seconds of walking at your normal cruising speed. Review the footage: check if your pole angle is sixty degrees, confirm your hand opens behind your hip, and ensure your elbow stays relaxed. If you experience lingering pain in your shoulder, elbow, or lower back, stop training and consult a physical therapist or a certified biomechanics specialist to evaluate your joint mechanics.