
Wet bogs break trekking poles. Slick bedrock snaps carbide tips, while saturated peat creates vacuum traps that rip lower shafts straight out of friction locks. When mixed sub-alpine terrain shifts from dry pack to saturated sphagnum and polished stone, your balance strategy must adjust before your boots hit the slime. Staying upright requires deliberate pole mechanics, correctly matched hardware, and an understanding of ground shear strength.
Every surface demands a distinct contact angle and pole load ratio. Nordic walking and trekking techniques that work on hard gravel fail completely when a pole tip slides on wet gneiss or buries itself 40 centimeters into acidic muck. The following field guidelines outline practical mechanical adjustments, gear dimensions, and recovery maneuvers for high-moisture routes across Scandinavia, the Scottish Highlands, and the Pacific Northwest.
Basket sizing: standard vs mud and snow discs
Switch your baskets before leaving the trailhead. Small stock discs measure roughly 38 mm to 45 mm in diameter, designed solely to prevent pole tips from wedging between dry granite cracks. On saturated ground, a 40 mm disc offers virtually no surface area. The pole sinks past the ferrule until your hand hits the bog surface, throwing your torso forward and loading your knees with eccentric braking force.
Mud baskets range from 55 mm to 65 mm in diameter. This middle profile delivers enough flotation to stop shaft plunge in wet turf while retaining enough clearance to keep from snagging every heather stem or dwarf birch shrub. Broad snow baskets measure between 85 mm and 100 mm across. While they provide wide platform flotation on soupy peat, their wide circumferences catch constantly on dense underbrush, creating lateral lever forces that bend carbon fiber shafts during high-cadence walking.
| Basket Type | Diameter | Weight (Pair) | Primary Terrain | Bog Performance |
|---|---|---|---|---|
| Standard Micro Disc | 38 mm - 42 mm | 14 g - 18 g | Hardpack, dry forest floor, scree | Submerges instantly; zero load support |
| Trekking Mud Disc | 55 mm - 65 mm | 24 g - 30 g | Saturated grass, mixed mud, tundra | Optimal; balances flotation with low snag rate |
| Powder Snow Disc | 85 mm - 100 mm | 38 g - 48 g | Deep snow, uncompacted muskeg | High float; severe snag hazard in brush |
Threaded basket attachments must be checked daily. Peat grit acts as a grinding compound that works screw-on discs loose within four to six kilometers of bog travel. If using press-fit baskets, inspect the retention notches for plastic fatigue. Replace brittle discs that have endured two or more cold seasons, as freezing water inside micro-fractures causes sudden ring failure under moderate body weight.
Finding purchase on slick granite and limestone
Carbide tips grip coarse granite through microscopic friction points, but wet rock changes the mechanics entirely. Wet granite covered in microscopic black lichen behaves like greased steel. Limestone presents an even harsher challenge: water dissolves its surface into a thin, slick slurry while foot traffic buffs the calcium carbonate to a mirror polish. Bare metal tips slip unless placed perpendicular to the rock micro-structure.
Keep your pole angle between 75 and 80 degrees relative to the rock plane. Jamming the pole forward at an aggressive 60-degree Nordic propulsion angle causes the tip to kick out backward, dumping your center of gravity onto your heels. Target natural depressions, mineral seams, and crystalline quartz veins. Coarse feldspar crystals in granite provide solid shelf purchase even when wet, whereas polished quartz ribbons reject metal tips entirely.
- Ditch rubber road boots: Wet natural rock requires bare concave carbide or knurled tungsten tips. Rubber caps hydroplane on wet algae films and trap grit that destroys the underlying carbide seat.
- Locate negative angles: Plant tips behind tiny rock steps or inside micro-fractures rather than balancing them on convex, water-sheened domes.
- Test before loading: Apply a sharp, downward 5-kilogram tap to confirm the tip has seated in a micro-crevice before committing upper-body mass to the pole.
- Listen to the sound: A high-pitched scrape indicates lateral slide; a dull, muted thud signals mechanical engagement with the rock surface.
Limestone features horizontal solution runnels, known as karren. Guide your pole tips directly into these recessed grooves. If the limestone surface shows smooth river polish or heavy trail burnishing, shorten your stride length by roughly 20 percent. This reduction keeps your center of mass directly over your base of support, limiting your dependence on friction-dependent pole purchase.
Peat bog crossings: weight distribution across four points
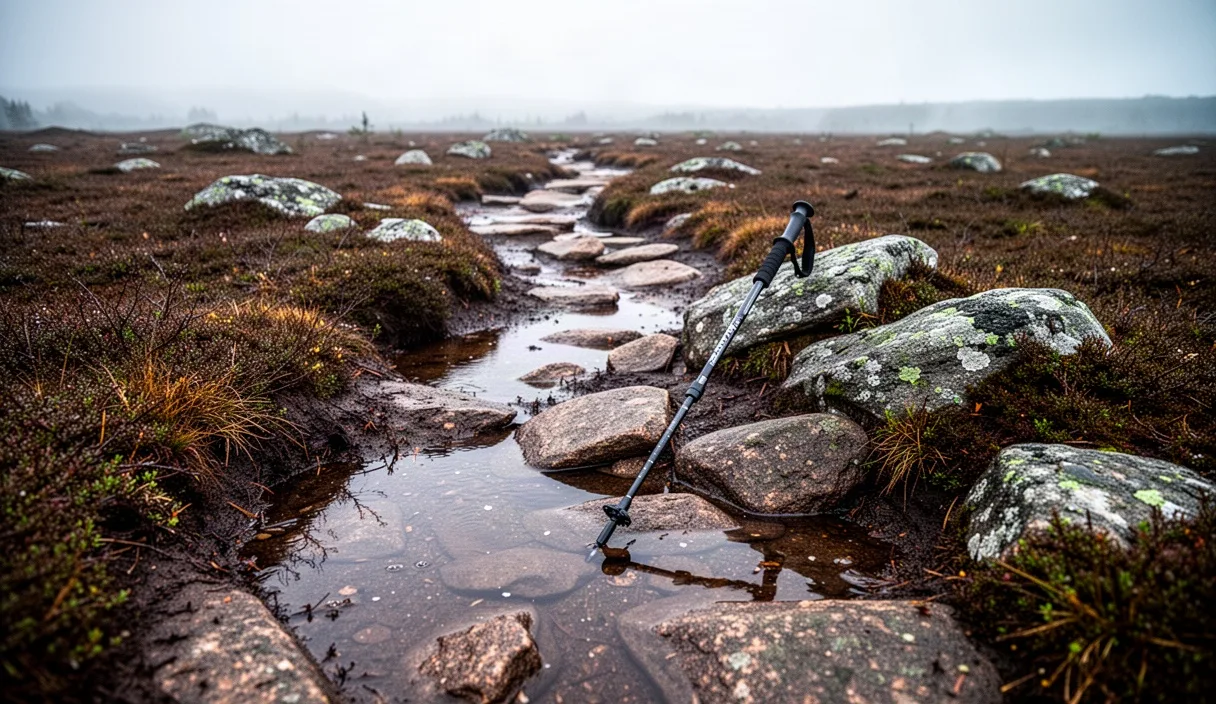
Crossing an open peat expanse requires constant four-point kinetic management. Never commit your entire weight to a single forward foot without two planted pole anchors behind or beside you. Wet peat is not a solid surface: it is a floating, hydric matrix of living sphagnum moss suspended over decayed vegetative matter and water pockets ranging from 30 centimeters to two meters deep.
Treat every crossing as a distributed-load exercise. Step deliberately on the crowns of raised sedge hummocks (Eriophorum vaginatum) rather than the green, low-lying mats between them. Hummock root systems weave dense structural netting that resists downward shear. Place your poles slightly outboard of the hummock roots to maintain lateral stability without puncturing the structural core that your boots rely on.
- Probe the forward step: Drive your leading pole firmly into the target surface 30 centimeters ahead of your foot. If the pole sinks past the basket with less than three kilograms of downward hand pressure, avoid that patch entirely.
- Establish secondary base: Plant the trailing pole 20 centimeters lateral to your rear boot, setting up a diagonal tripod before lifting the rear foot.
- Roll the step: Step forward with a flat, midfoot strike to maximize boot lug surface area. Do not lead with an aggressive heel plant, which breaks through the turf crust.
- Transfer mass progressively: Shift your body weight forward gradually across both boots while keeping roughly 15 to 20 percent of your mass transferred through the pole grips.
- Recover the trailing pole: Lift the rear pole cleanly upward along its insertion axis only after the forward foot is fully weighted and stable.
Maintain continuous movement. Peat displays thixotropic properties: static weight forces water out of the moss matrix, rapidly liquefying the ground beneath your soles. If you stand motionless for more than four seconds, your boots will settle into the mud. Keep a steady, measured tempo of 70 to 80 steps per minute to distribute your load across the surface tension of the bog.
Maintaining pole balance over exposed wet roots
Wet birch, spruce, and pine roots combine high surface lubricity with rounded geometries. Planting a carbide tip directly on top of a wet lateral root guarantees an instant tip slide, often wedging the lower shaft under an adjacent root and snapping the pole as your momentum carries you forward. Treat root systems as barriers to bridge rather than stepping platforms.
Identify the root run pattern. Conifers send lateral roots wide across rocky substrates, forming interlocking wooden grids that trap standing water. Never step or plant poles inside the center of root loops, which typically conceal mud traps or hollow air pockets where soil has washed away underneath.
- Target root interspaces: Plant pole tips into the gritty soil, pine needle pack, or gravel caught between root corridors, keeping the tip at least 50 mm clear of root bark.
- Use perpendicular blocking: If a root span cannot be avoided, set the pole tip against the downslope base of the root so the wood acts as a physical stop rather than a balance point.
- Unlock wrist straps: Remove your hands from pole straps when traversing extensive root carpets. If a tip wedges in a root fork while you fall, wrist straps can hyperextend your thumbs or fracture your ulnar styloid process.
Adjust your grip height rather than altering pole length when navigating high root steps. Choke down on extended foam grip sleeves by 10 to 15 centimeters. This lowers your center of leverage, stiffens the upper shaft under sudden loads, and prevents your elbows from flaring out wide, which compromises lateral balance on narrow trail benches.
Emergency pole retrieval when tips stick in deep mud
Saturated mud functions as a hydraulic piston. When a trekking pole sinks deep into silty clay or bog muck, air is displaced. Pulling straight up on the grip forms an intense vacuum around the basket and tip, easily exceeding 15 kilograms of resistance. Yanking upward from the handle often separates two-piece twist locks, bends lever-cam shafts, or strips the basket clean off the lower ferrule.
Clear the vacuum before applying vertical force. Stop forward momentum immediately; moving forward while the tip is anchored acts as a fulcrum, bending the aluminum or snapping carbon fibers across the mud line. Reverse your stance, bring your boots as close to the stuck shaft as safety permits, and work the pole free using rotational and lateral clearance techniques.
- Break the suction seal: Grip the pole shaft low down, roughly 10 centimeters above the mud line. Gently oscillate the shaft in small, tight circles no wider than 50 mm to carve an air pocket around the lower ferrule.
- Twist clockwise: Rotate the pole clockwise while applying slight upward pressure. Clockwise rotation keeps threaded lower sections and screw-on baskets tightly engaged rather than unscrewing them inside the mud.
- Vent the chamber: If the pole remains stuck, press a branch or your boot toe firmly into the mud adjacent to the shaft to open a venting channel, letting air rush down to the basket.
- Lift along the axis: Once the vacuum seal releases (marked by an audible slurping sound or reduced resistance), draw the pole straight upward along the exact angle of entry. Never pry the pole horizontally against the ground.
If the lower section pulls completely free from a friction-lock pole, do not blindly dig with your hands into unknown bog mud, where sharp submerged rocks, glass, or roots may be hidden. Use a stout stick to probe alongside the lost section, hook the basket flange, and pull the lower assembly free along its original entry path.
Common mistakes
Trail runners and fast hikers consistently commit four mechanical errors on mixed wet terrain:
- Relying on wrist straps in technical hazards: Straps optimize arm power transfer on flat, uniform trails. In deep bogs and wet root mazes, they anchor your hands to falling leverage arms. Take your hands out of the straps whenever slip risks multiply.
- Over-tightening pole locks with cold fingers: Over-torquing lever locks in freezing, wet conditions cracks plastic cam collars. Clean grit from cams regularly and use proper adjustment tension: the lever should require firm palm pressure to close, without white-knuckle strain.
- Planting poles too far forward on descents: Reaching out downhill drives the tip into slick mud at an acute angle, inviting an immediate slide. Keep pole plants closer to your boots, dropping your center of gravity through bent knees.
- Ignoring ferrule grit: Allowing silt to dry inside telescopic pole sections turns interior aluminum into chalky aluminum oxide. Rinse lower sections in clean streams after bog routes before collapsing them for transit.
Practical next steps
Audit your equipment before your next wet-trail outing. Remove your standard micro-baskets and thread on 60 mm mud baskets, applying a tiny drop of silicone or removable threadlock if your brand uses screw-on designs without locking teeth. Inspect your pole tips: if the carbide point has worn down flush with the plastic ferrule, replace the tip assembly using a heat gun or hot water soak to soften the factory adhesive.
Practice strap-free balance drills on low-risk muddy paths to build reactive forearm and core stability without mechanical crutches. Check your pole segment tolerances by cleaning the bare inner metal with isopropyl alcohol; never lubricate trekking pole shafts with oil or grease, as friction mechanisms rely strictly on clean, dry surfaces to hold their rated load. If you experience persistent wrist or shoulder pain from jarring tip slips, consult a physical therapist to evaluate your load carriage posture and pole strike mechanics.